Add Google Analytics 4 (GA4) to Track Online Forms

Formsite form owners can add tracking to their forms from any service they prefer. Many choose Google Analytics for its speed, reliability, and integration with Google Ads. For forms already set up with Google Analytics and for new implementations, Google Analytics 4 (GA4) is the newest way to go.
For forms already using Google Analytics, you still need to change to GA4. This is a service change by Google and the old Analytics has a scheduled date to stop working:
On July 1, 2023, standard Universal Analytics properties will no longer process data. You’ll be able to see your Universal Analytics reports for a period of time after July 1, 2023. However, new data will only flow into Google Analytics 4 properties.
source: https://support.google.com/analytics/answer/10089681
How to Track Online Form Views and Submissions
Form owners add custom code to a few different places depending on what they want to track. For example, to track the number of form submissions the code goes on the Success Page, which shows after every successful submission.
To track where people come from (the referrer) or how long they spend on the form, the code needs to appear on the form itself.
Add Google Analytics 4 (GA4) to Formsite Forms
Start by locating the Google tag in your Google Analytics account. Google’s instruction page has the steps for locating the tag code, and the basic steps are.
- Sign in to your Google Analytics account.
- Click Admin.
- At the top of the “Property“ column, use the dropdown selector to select the property that contains the data stream for which you want to set up your Google tag.
- In the “Property“ column, click Data streams.
- Click the data stream that you want to edit.
- Under “Google tag“, click Configure tag settings.
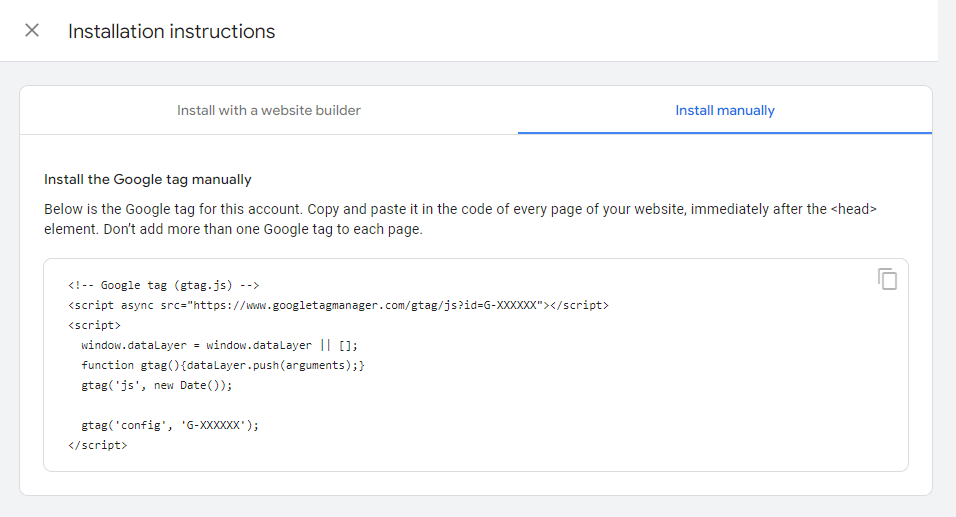
- In the “Your Google tag” section, click Installation instructions.
- In the “Installation instructions“ page, select “Install manually“:
On the screen, you’ll see the JavaScript snippet for your account’s Google tag. Your Google tag is the entire section of code that appears, beginning with:
<!-- Global tag (gtag.js) -->
and ending with
</script>
Add GA4 code to the form:
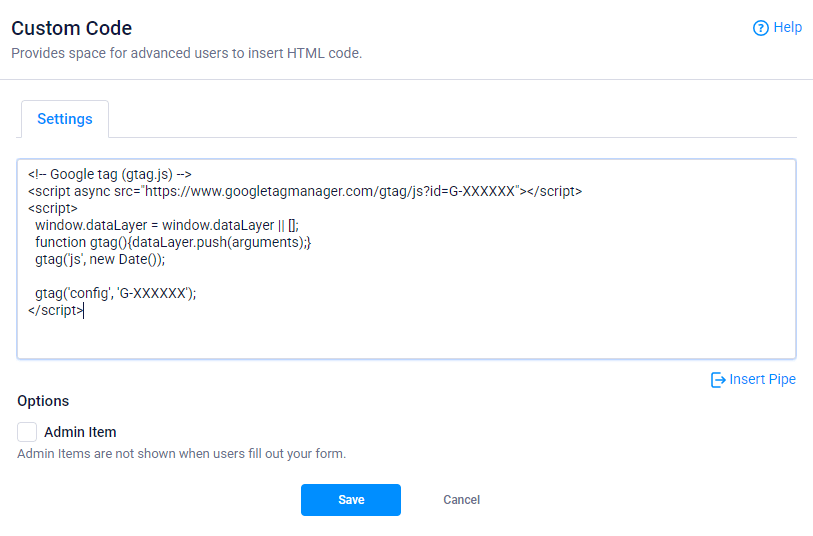
- Go to the form editor
- Click on Formatting Items in the left column then drag a Custom Code item to the top of your form, then paste the Google tag code and click save.
Add GA4 code to the Success Page:
- Go to the form’s Form Settings -> Success Pages page
- Click Create New Success Page and choose the Custom Success Page
- Fully complete the customization of the Success Page. Adding the Analytics code requires disabling the visual editor so changes after this point are more difficult.
- Once the page design and text are complete, uncheck the setting to ‘enable text editor’.
- Copy and paste the Google tag code to the top of the Success Page code, then click save.
Redirect URL Success Pages
A Formsite customer sent us a tip for retaining attribution data when using the Redirect URL Success Page. You can prevent losing the campaign information by appending “utm_nooverride=1” to the URL. For example, if your URL is https://www.example.com, your new URL would be:
https://www.example.com?utm_nooverride=1
Information for Current Google Analytics Users
If you haven’t made the switch to GA4 and want to continue collecting analytics data after July 1, 2023, enable Google Analytics 4.
If you have enabled GA4 and need to update your forms’ code, you can choose to either:
- Use both GA4 and the old Universal Analytics at the same time, or
- Only use GA4
To use both, see Google’s instructions here https://support.google.com/analytics/answer/9744165
To change forms to GA4 only, use the instructions above for adding the Google tag to your forms.