Integrate Formsite forms with Airtable
Formsite’s new integrations area allows for browsing 2,000+ possible destination services. Using Zapier with Formsite lets form owners collect data to start their custom process. One of the most powerful tools available is Airtable, a database system for keeping track of anything.
Airtable is an online service that is like a spreadsheet and like a database, but also much different. When you first start with a new Airtable account, the templates seem to be familiar with columns and rows. The deeper you get, the more you see how to connect records to each other beyond normal spreadsheets.
Our Zapier integration connects Formsite with Airtable to create an awesome workflow process. Let’s see how it works.
Start with the Form
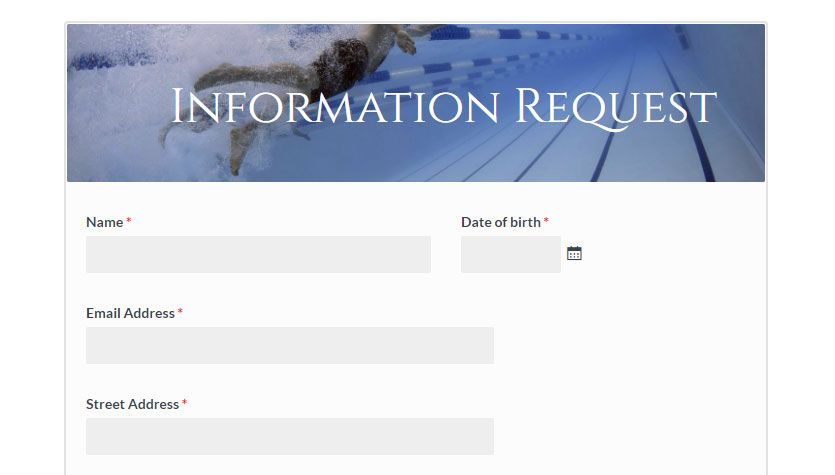
The process for connecting Formsite to Airtable goes through Zapier and starts with the form. Use the form builder to create the form containing the items for each record. For example, use Short Answer items for text-based questions like ‘Name’ and ‘Address’.
Be sure to use the ‘Email Address’ item for instant format validation from the browser and to send Notification emails. Use Radio Button, Dropdown, and Checkbox items for multi-select questions or options.
When the form is complete, click the View Form button and complete an example result. This test result provides sample data for Zapier during the setup process.
Build the Table
Log in to an Airtable account and make a new table. I’ve made a new base called ‘Formsite forms’ and a new table called ‘Information request’. The next step is to create new columns for each form item and any custom fields needed. I’ve included a status column for workflow tracking.

Connecting Formsite to Airtable
After completing the form and table, here is how to connect them using Zapier:
Make a Zap:
Log in to Zapier or make a new account, and click the Make a Zap button.
Trigger (Formsite):
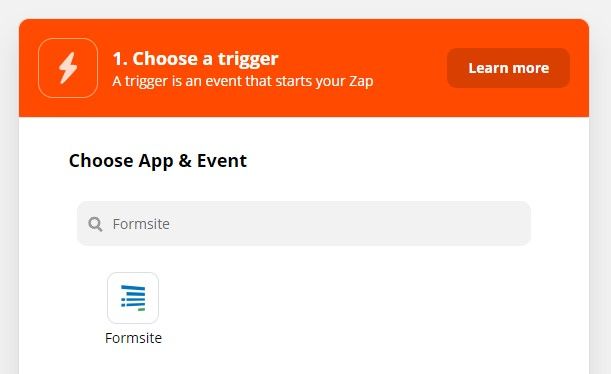
- Choose App & Event: Type Formsite into the search box, then click the Formsite button
- Trigger Event: New Form Result
- Choose Account: If this is your first time using Zapier with Formsite, you will need to click the ‘add a new account’ link. Select your Formsite account.
- Customize Form Result: Click the dropdown to choose the form you made earlier.
- Find Data: Click the Test Trigger button to retrieve the test result from the form.
Action (Airtable):

- Choose App & Event: Type Airtable in the search box and click the Airtable icon.
- Action Event: Choose from Create Record, Update Record, or Find Record.
- Choose Account: If this is your first time using Zapier with Airtable, you will need to click the ‘add a new account’ link. Select your Airtable account.
- Customize Record: Click the dropdowns to choose the base and table to use with this form.
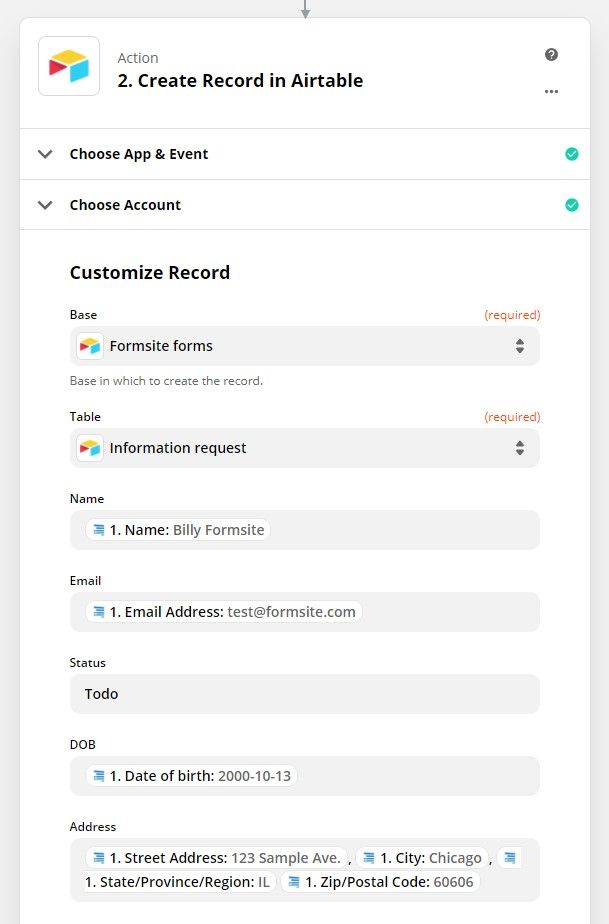
Zapier retrieves the table columns from Airtable and lists them in the Zap. This step requires that you choose or type the data to include. For example, for the ‘Name’ column I click the field and select the ‘Name’ item from the form.
For the ‘Status’ column, since there is no form item with that data I type the appropriate starting value ‘todo’. For the ‘Address’ column, I have multiple form items to merge into the cell separated by commas.
Send Data to Airtable:

Click the Test and Review button to send the sample form result to Airtable and confirm that the settings are correct. If all is working as expected, click the button to turn on the Zap.