Integrate Microsoft Office 365 with Online Forms

Formsite’s integrations search allows for browsing our native integrations and those provided by Zapier. Using one of Zapier’s 2,000+ services with Formsite lets form owners collect form results to start their custom process. One of the most popular tools available is Office 365, Microsoft’s suite of communication and document applications.
Microsoft Office 365 allows Zapier users to create contacts, trigger emails, and create new calendar events. Our Zapier integration connects Formsite with Office 365 to trigger actions after each new submission.
Send Notifications with Outlook using the Office 365 Integration
Form owners can send Notification emails using Outlook with the integration with Zapier. The steps begin with building the form, then connecting the accounts at Zapier, then making the Zap.
Start with the Form
The process for connecting Formsite to Office 365 starts with the form. Use the form builder to create the form, with Short Answer items for text-based questions like ‘Name’ and ‘Address’.
Be sure to use the ‘Email Address’ item to validate the formatting of email addresses. Use Radio Button, Dropdown, and Checkbox items for multi-select questions.
When the form is complete, click the View Form button to complete a test result. This test result provides sample data for Zapier during the setup process.
Connect Formsite and Office 365 in Zapier
- Log in to Zapier or make a new account, and click the Make a Zap button.
Trigger (Formsite):
- Choose App & Event: Type Formsite into the search box, then click the Formsite logo
- Trigger Event: New Form Result
- Choose Account: If this is your first time using Zapier with Formsite, you will need to click the ‘add a new account’ link. Select your Formsite account.
- Customize Form Result: Click the dropdown to choose the form you made earlier
- Find Data: Click the Test Trigger button to retrieve the test result from the form

Action (Office 365):
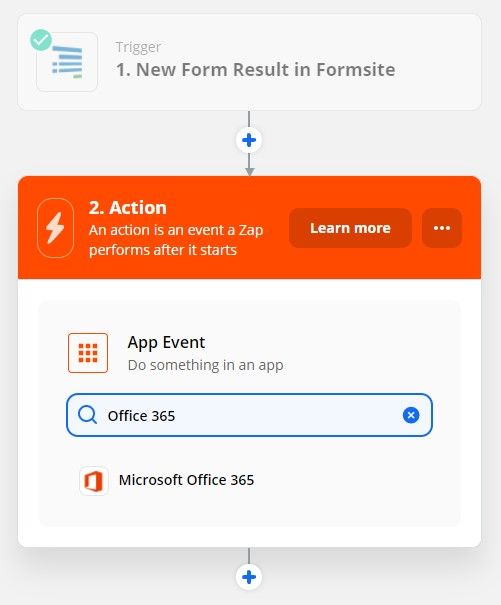
- Choose App & Event: Type Office 365 in the search box and click the logo
- Action Event: Choose from Create Contact, Send Email, or Create Event
- Choose Account: If this is your first time using Zapier with Office 365, you will need to click the ‘add a new account’ link. Select your Office 365 account and allow Zapier to use your account.
- Set up Action: Click the dropdowns to choose the email settings and content from the form
Zapier retrieves the email settings from Office 365 and lists them in the Zap. This step requires that you choose or type the data to include. For example, for the ‘To email(s)’ I click the field and select the Email Address item from the form. I can include more email addresses here or enter as CC or BCC addresses, too.
The Subject Line can include any form information by selecting the appropriate data in the test result. For the email Body, I can choose either Text or HTML as a format, then include any result data to include.
- Test Action:
Click the Test and Review button to send the sample form result to Office 365 and confirm in the email that the settings are correct. If all is working as expected, click the button to turn on the Zap.
Create Contacts and Create Events
Creating new contacts and events uses the same steps as sending email. Use Zapier to format the new contact or event, then submit tests to make sure everything works as expected.