Workflow Forms for Approvals & Follow-ups
Connecting forms to multiple people for approvals, follow-ups, and other multi-step systems is what we call Workflow. While there are other ways to pass information between forms (as we outlined in a previous blog post), this online form Workflow feature lets the system automate the process for you.
What is Workflow?
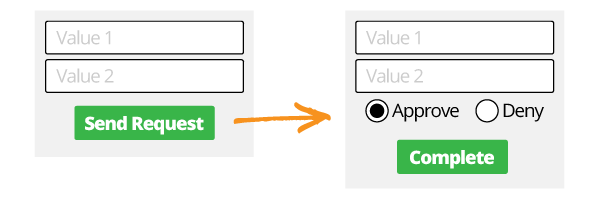
Scenario: You are tasked with making an online expense report. You will need to create your form that sends the employee’s expenses to their supervisor for approval before submitting.
Note: This same idea works for any process that requires a middle step, such as referrals for application forms, customer support forms, human resources forms, etc.
1. Create your forms
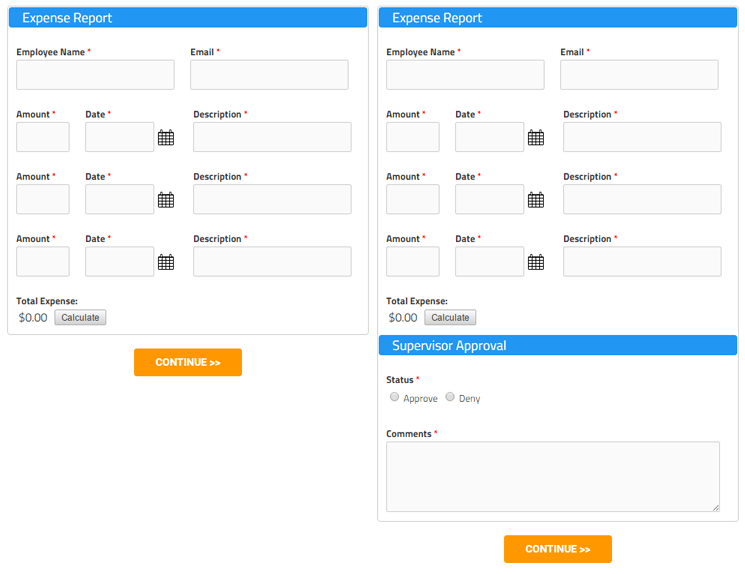
The first step is always to create your forms and we’ll connect them in a later step. In our expense report scenario, we’ll need the employee’s basic information and the expense information, along with a Calculation item to get the total expense.
Then we need to create the supervisor form. Start by copying the form in the My Forms page by clicking the form’s copy icon. Next, edit the form to add the supervisor items: Approve/Deny radio button item and Comments item.
2. Workflow magic
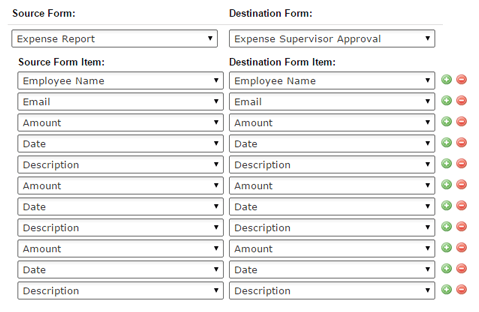
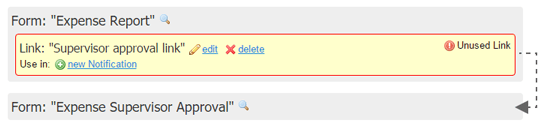
First, go to the User menu -> Workflow page and create a new Workflow choosing the source and destination forms. Next, go to the Workflow Mappings page and create a new Workflow Mapping by selecting your source form, destination form, and the fields to connect.
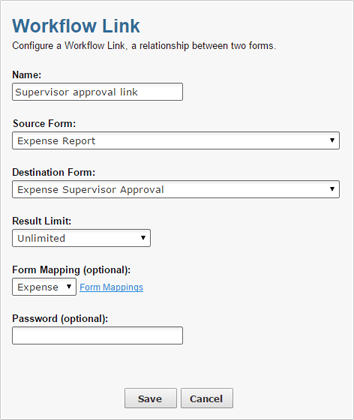
Next, return to the Workflow page and click the Edit link to edit the link. Set the link information, being sure to select the form mapping created in the previous step.
Result:
3. Notifications
The last step is to create the email notifications. What we need:
- Initial email from employee to supervisor
- Approved email from supervisor to human resources
- Reply to employee with approval or denial with comments
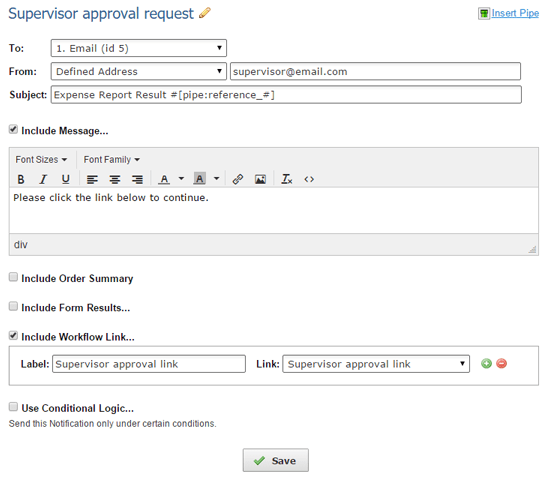
Expense form: The first form has a single notification that contains the Workflow link. Set it up with the supervisor’s email address as the To field and set the From field to be the Email Address item from the form. Be sure to also check the box to include the Workflow link and select the proper link from the options.
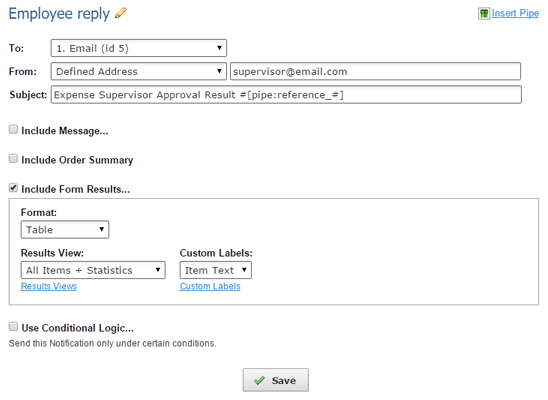
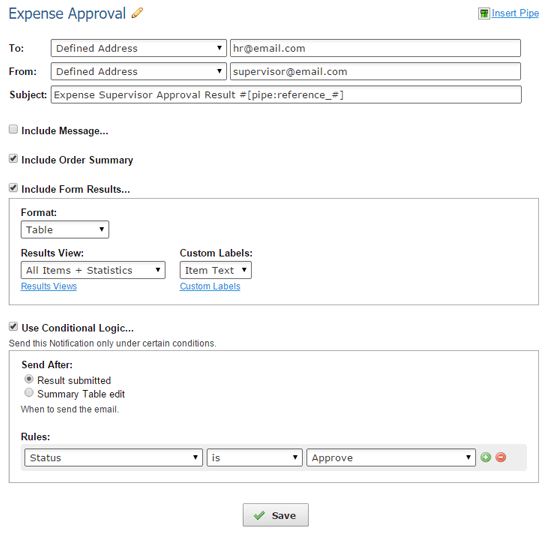
Supervisor form: This form contains the other two notifications and will only send the HR one when it’s approved.
Notification 1 uses the employee’s Email Address item as the To field and the supervisor’s address in the From field. Simply include the form result to pass along the status and any message.
Notification 2 has the HR address in the To field and either the supervisor’s or employee’s email address as the From field. Check the box next to Use Conditional Logic and tell it to send only when the Approve/Deny item is marked Approve.
That’s it! Be sure to run it through some tests to see how it works and how you can customize the process to serve your individual needs better.