How to Create an Online Form With Stripe

Creating online order forms that accept Stripe payments with debit and credit card payments is easy with Formsite. It’s easy to create travel forms, order forms, or subscription forms with recurring payments. Use the Stripe integration to collect payments with no coding experience, tailored to your brand, and embedded on your site.
Best Practices for Creating Online Forms
While every form and survey is different, there are common best practices that apply to all. Use these tips to improve completion rates and customer experience:
- Use the right item types.
Using the right item types for the fields on your form will ensure you get the answers in the correct format. For example, to collect email addresses be sure to only use an Email Address item. Another common item type is the Checkbox item. This item allows form users to see a group of answers before checking the box next to the ones they want. Short Answer and Long Answer items allow form users to answer a question or fill out a form field in greater detail, using longer sentences. - Only gather necessary information.
Asking for information that doesn’t relate to the form’s purpose invites doubt in form users’ minds. That doubt reduces the likelihood that they’ll actually follow through to complete your Stripe payment form. Forms that only collect necessary answers assure users that the form and your organization are trustworthy. - Break up your form into short pages.
Form users are more likely to convert when faced with fewer questions per page. So only include a few items per page, or even one question per page. - Use helpful placeholder text.
When an answer needs specific formatting, use placeholders to show the required format. For example, if you need addresses with no abbreviations you can add a note as the placeholder text. - Use Success Pages.
Confirmation emails often end up in the spam folder. Avoid sending emails containing simple messages like “Thank you for your submission”. Instead use a Success Page that form visitors see immediately after submitting the form. - Let users opt-in for further communication.
Do not assume that your form visitors want to receive your email. Add a Checkbox item letting them agree to receive your email, then use the Notification’s Conditional Logic to only send to those who opt in.
Best Practices for Creating Online Forms with Stripe
Beyond best practices for creating online forms, online order forms using Stripe have their own list of best practices. They are:
- Order form fields from the simplest to the most complex.
Forms starting with easy questions are more likely to convert than those with more complex or sensitive requests. By giving visitors small, low-risk tasks at the beginning of your form, it increases buy-in across the form as a whole. That encourages respondents to keep answering questions and filling in fields. - Include accurate descriptions.
Regardless of the product or service, be sure to include detailed information and photos where appropriate. By using descriptive details, form conversion will increase due to increased confidence. - Make it easy.
Avoid asking potential customers to do more than is necessary. For example, it’s common for shipping and billing addresses to be the same. Build the form with both address blocks then add a Checkbox for “Different shipping address”. You can then add Rules to the shipping address items to show only after checking that box. - Make your online form with Stripe mobile-friendly.
All Formsite forms are responsive, and here are a few tips to further optimize your order form for all visitors:- Reduce the need for scrolling. Split long forms into shorter pages or even one item per page.
- Large images can take too long to load on mobile devices. Avoid them or reduce their size.
- Skip complex item types like Matrix items. Complex items can be difficult to use on a small screen.
- Include your form’s provided QR code. Used on printed materials for easy mobile links, the QR code lets users reach your form link by scanning the code.
- Develop and include a privacy policy.
If you don’t already have a privacy policy in place, establish one and then follow it. For online purchases especially, visitors appreciate knowing you are protecting their information. - Use the Success Page as a receipt.
The Success Pages display after completing the form and payment. The built-in Successful Order page shows the visitor that the order is successful. Another option is to create a custom receipt with the Success Page’s text editor and the form’s pipe codes. Be sure to include customer service contact information. - Optimize your CTA.
A good CTA (call to action) helps to maximize online form conversions. Use your form’s Form Settings -> Custom Text page to customize the button text, whether it’s “Donate Now”, “Subscribe Today”, or “Place Order”.
The Benefits of Formsite’s Stripe Integration
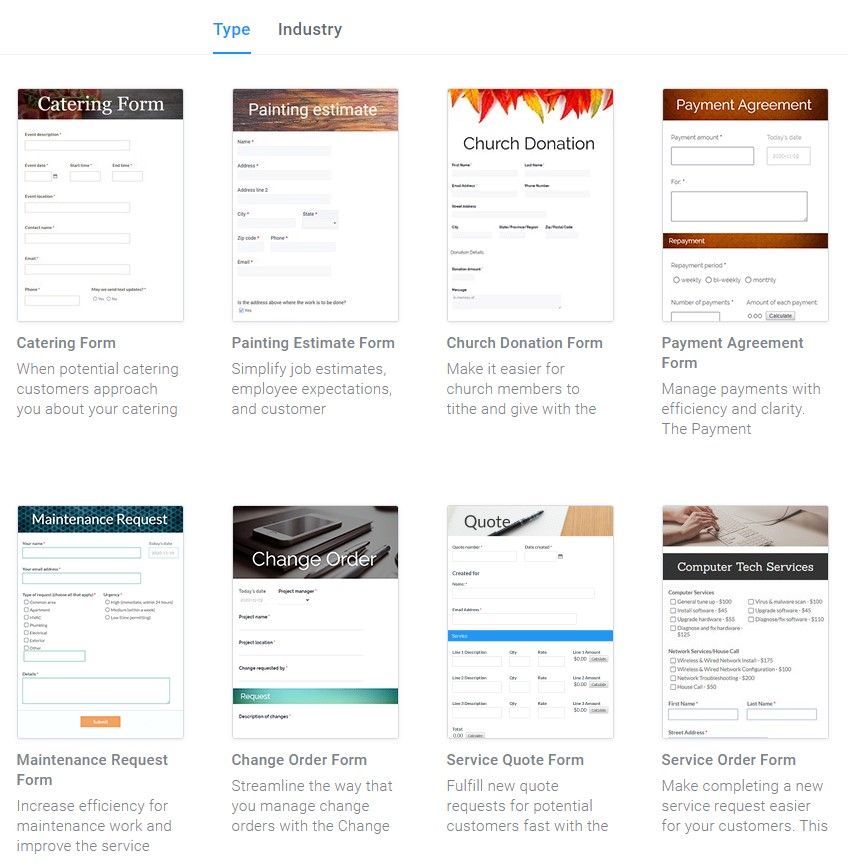
- Formsite’s template library has hundreds of prebuilt order form templates suitable for use with Stripe. There’s no coding required to use the form templates, including those created with a blank template. You can use the drag and drop form builder to create an online form for your exact purpose.
- All Formsite forms have a unique embed code for displaying on your site; also with no coding or HTML knowledge needed.
- All payments on Formsite are secure payments. Every page uses our SSL, which shows in the address bar starting with ‘https’. The ‘s’ at the end stands for ‘secure’. All data passing through the browser sends as encrypted data, including uploaded files and downloads.
- Our Stripe integration gives your form users a simplified checkout process and an easy way to pay. Formsite’s Integrations make it simple to connect to other online services like Google Drive, Salesforce, and more. Our Zapier integration allows for connections to thousands of other online services, too.
- The Workflow tools let form owners create custom connections between forms to pass data. Workflow is an automation tool that makes it easy to send follow-up forms, approvals, and upsells.
How to Create an Online Form With Stripe
1. Sign up for your free account
Go to Formsite.com and click the Free Trial or Sign Up Free button. After signing up, you’ll be immediately enrolled in our 14-day free trial of the Pro 1 service. The trial gives you high limits for testing and grants you access to our integrations, including Stripe.

2. Create your online form
Click the Create New Form button on the My Forms page. Then browse and select a form template or start with a Blank Form. Browse our template library for ideas and examples of questions, styles, and functionality. Once you’ve made a selection or chosen the Blank template, click the green “Create New Form” button at the bottom of the page. Type the name of your form in the “Name” field, then click the green “Create” button.
3. Build your Stripe order form
Whether you’re using a form template or blank form, use the Form Editor to add, edit, and delete form items.
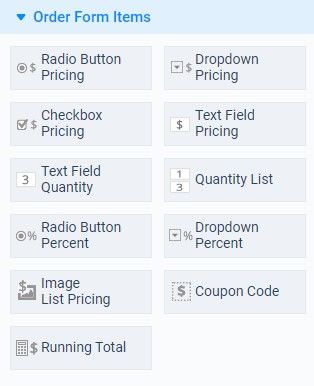
In the Form Editor you can use our drag and drop editor to add, remove, and edit form items. The Order Form Items contains pricing items and quantity items to build your order. The Dropdown Pricing item lets you add options with a price, then the visitor selects a choice and its price adds to the order total.
Add a Text Field Quantity item to the left of the pricing item to let the visitor order more than one. The Text Field Quantity item only works when it’s immediately before a pricing item. An alternative to the quantity + pricing sequence is the Quantity List item. That displays a list of choices with the quantity field built in, then calculates the cost and adds to the order total.
The Style tab allows form owners to transform their online form’s appearance so it adheres to brand style guidelines. Change fonts and colors and upload new images with the Themes and Customize areas. If you’d like to make changes to the form’s CSS, you can use the Advanced area to do that.
4. Set Rules for your order form
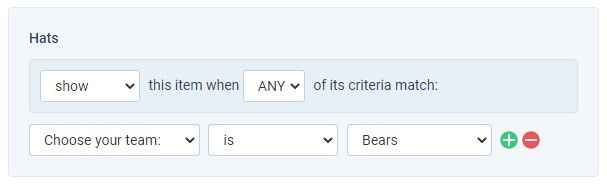
Rules let you show follow up questions or skip pages in your form. For example, you can have an item ask for the visitor’s country, then display US address items if they answer “USA”, or Canadian items if they answer Canada.
Use the Rules page to view and edit all rules for the entire form, or edit an item and click its Rules tab to edit only that item’s Rules. Page Rules tell the form what to do after that page, like repeat the page or skip to a later page based on a previous answer.
5. Enable the Stripe Integration
After completing your order form, go to Form Settings -> Payments and click the Stripe icon. You’ll need to log in to your Stripe account to get the publishable key and secret key. In your Stripe account, go to Account Settings -> Developers -> API keys. Stripe provides test keys to make testing easier, so copy and paste the Test keys into the authentication fields, then click Save.
Add a name and description for where the charge is coming from when it appears in their Stripe account. Here you can also choose either the built-in Order Success page or a custom Success Page. If your form collects email addresses, you can choose to map it using the Stripe integration settings, also.
6. Test your form
Go to the form’s Share page and click the Form Link, then submit a test payment using the information from their test pages.
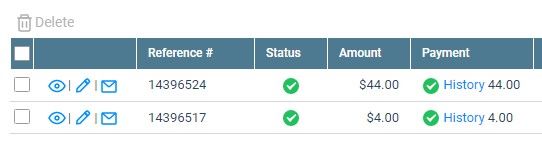
In the form’s Results page, the Results Table contains every form result and order. There are two status columns labeled “Status” and “Payment.” The Status column shows a green “complete” icon for successful results. The Payment column shows “complete” for successful payments and the History link shows any details. An “incomplete” icon in the Payment column means the order is not complete. If the Status column is green and the Payment column is yellow, that means the visitor’s payment was not successful. For unsuccessful payments, there is not much you can do besides send a follow-up email to try and persuade them to submit the form again. If they do not, you can delete the result.
Use the Form Settings -> Notifications page to send emails after each submission or successful payment. The Notifications have conditional logic where you can send only after the payment success. The default action sends Notification emails after submitting but before payments.
Once you’re satisfied with the form’s operation, replace the Test keys in your Form Settings -> Payments -> Stripe page. The Live keys allow your form to collect real payments.
7. Share your order form
Every form gets its own unique link under “Form Link” on the Share page. You can also embed the form on your site so it appears at your custom URL. To do this, create the page on your site where you want the form to appear, then copy and paste the provided code under Share -> Embed Code. If your site is a WordPress site and you’ve installed the Formsite WordPress plugin, use the shortcode provided under the Share -> WordPress page.
If at any time you need help creating, editing, testing, or sharing your form, click the Support link at the top of the page. From there, you can ask a question, check our knowledgebase articles, or send an email to our Customer Support team.
Building online forms that can accept payments through Stripe is easy with Formsite. Get started today!