Create an Excel Integration for Online Forms

Formsite’s Google Sheets integration is a popular and useful tool for many customers. Some customers use Microsoft products, however, and use Zapier as a solution. Using Zapier, they connect their online forms for a custom Microsoft Excel integration.
As with Google Sheets, the Excel integration updates a specified spreadsheet with new results. Some useful ideas include:
- Use as a data backup
- Share results with colleagues
- Create custom analytics charts and graphs
- Make custom reports with statistics and equations
Build the Online Form
Like the other Zapier integrations, everything starts with the form. Use the form builder to create the form, with Short Answer items for text-based questions like ‘Name’ and ‘Address’. Be sure to use the ‘Email Address’ item for proper formatting of email addresses. Use Radio Button, Dropdown, and Checkbox items for multi-select questions.
When the form is complete, click the View Form button and submit the form to complete a test result. This test result provides sample data for Zapier during the setup process.
Set up the Microsoft Excel Integration in Zapier
Log in to Zapier or make a new account, and click the Make a Zap button.
Trigger (Formsite):
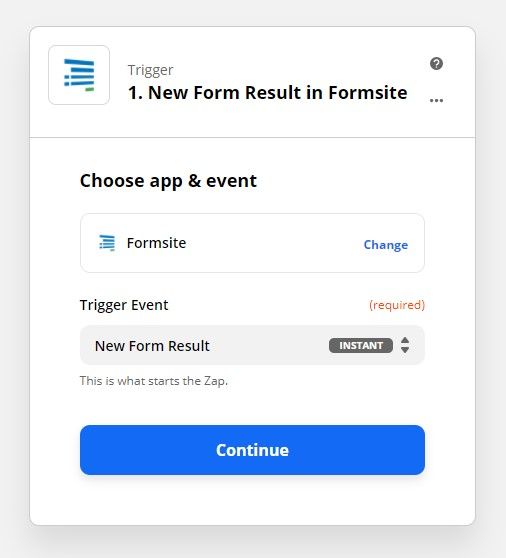
- Choose App & Event: Type Formsite into the search box, then click the Formsite logo
- Trigger Event: New Form Result
- Choose Account: If this is your first time using Zapier with Formsite, you will need to click the ‘add a new account’ link. Select your Formsite account.
- Customize Form Result: Click the dropdown to choose the form you made earlier
- Find Data: Click the Test Trigger button to retrieve the test result from the form
Action (Excel Integration):
- Choose App & Event: Type Excel in the search box and click the logo
- Action Event: Choose Add Row, Update Row, Find or Create Row, or any of the other actions
- Choose Account: If this is your first time using Zapier with Excel, you will need to click the ‘add a new account’ link. Select your Microsoft account and allow Zapier to use your account.
- Set up Action: You can choose a spreadsheet in either OneDrive or Sharepoint folders. Also, you can choose an existing spreadsheet and a specific worksheet or create new ones.
Continue setting up the action to send the desired form answers to the Excel spreadsheet, then test. Click the Test and Review button to send the sample form result to Excel and confirm that the spreadsheet received the data. If all is working as expected, click the button to turn on the Zap.