How to Limit Registrations and Create a Waitlist

Formsite’s registration form templates give event managers a fast and easy way to collect ticket orders. Whether the registrations are ongoing or a one-time event, organizing registrants is essential. There are times when an event has limited capacity and the demand for spots exceeds the number available. When that happens, a waitlist can be useful.
Fun fact: Waitlist is one word when it’s a noun but hyphenated when it’s a verb:
- “Please sign up for our waitlist”
- “Click here and we’ll wait-list your information”
The registration flow would work something like this:
- You direct people to your form via a QR code or the form link in an email, or they reach your form embedded on your site.
- Visitors complete the registration form to register for the event. They have the option to reserve one or more spots and complete a payment, if applicable.
- When the form collects the limit of registrations, it displays a message and offers a way to sign up for a waitlist.
- If new spots become available, the form owner can trigger an email to the visitor so they can sign up.
Limiting Registrations
There are two ways to control the number of registrations with Formsite forms and which way you choose depends on a few factors. The considerations are:
- Does each submission equal one ticket or can visitors reserve more than one?
- Is the event a one-time event or is there an option to choose a date and/or time?
- Will you collect a payment with the form or is there no payment or some other way to pay?
Option 1: Custom Results Limit Waitlist
The first way to limit registration is to use the Form Settings -> Open/Close page and set a custom results limit for the form. You would use this method if the answers to the consideration questions are:
- One result is one ticket
- The event is a one-time event
- No payment with the form (maybe)
This setting displays a custom message once the form’s Results Table has reached your indicated number of results. The reason for the ‘maybe’ in the payment condition is that you can track and delete incomplete payments to keep the number correct. Incomplete results are still counted as results, though, so they still count toward the results total.
When choosing this method, the message on the settings page would contain something like:
Thank you for your interest in our event. We’ve currently reached our capacity but you can sign up on our waitlist at this link.
Option 2: Inventory Waitlist
The Inventory setting can limit registrations when the answers to the conditions are:
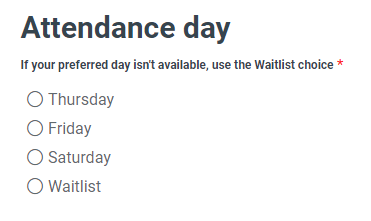
- Each submission can be for one or more seats
- The event has more than one day or times to choose from
- Visitors pay through the form and you don’t want to delete incomplete orders right away
The Inventory setting appears on multi-select items and can use Rules to show items based on answers to previous questions. While there aren’t Rules based on the Inventory count, you can add an option for the waitlist in your list of options. You can then add a Success Page with the Redirect URL format that points to your waitlist form. Then when the visitor answers ‘waitlist’ make a page rule to skip to that Success Page.
Set up a Waitlist
Make a new form for your waitlist then use its link for visitors to click or as the Redirect URL. You can use the Pre-populate link instead if you want to pass information to that form, too. Visitors to the form submit their information to add themselves to the waitlist and await your contact.
One of the most important aspects of a waiting list is the communication by the event organizer. Start by setting up the form’s Notifications to send an instant acknowledgement of their result. A tip to make it easier in the future is to set up one of the email integrations like Mailchimp or Constant Contact. That way you can send an email to the entire group with updates when needed.
Another important feature is the ability to move results from the waitlist to the registration form. There are a few ways to do this, but the easiest way would be to add a Checkbox item marked as Admin with a single choice of “registered”. Next, you would create a Notification with the conditional logic to send after updating the result and the checkbox is checked. The message would be something like:
Great news! Space for our event has become available and you’re next on the waitlist.
If it’s more practical to copy the result to the original registration form, that’s possible by following the steps in this article. You could then make a Notification in that form, set it to ‘disabled’, then manually send it by clicking the envelope icon on the result after it’s imported.