How to Create an Online Form With PayPal

Custom online forms that accept PayPal payments are easy with Formsite. Choose the PayPal Business integration to accept credit and debit cards, PayPal payments, Venmo, PayPal Credit, Pay in 4, and local processors around the globe. Process secure payments and collect data with forms customized for your organization. Use the PayPal integrations to collect payments with all kinds of forms like order forms, event registrations, and subscriptions, for example.
Best Practices for Creating Online Forms
While every form and survey is different, best practices for usability and easy building apply for all. From college applications to restaurant order forms, these tips help form owners and visitors alike:
- Only gather information necessary to complete the form.
Asking for information that doesn’t relate to the form’s purpose creates doubt in form users’ minds. That doubt reduces the likelihood that they’ll actually follow through to complete the form and payment. Forms that collect only information needed reassure form users that the form and your organization are legitimate and trustworthy. - Use correct item types throughout your form.
Certain form questions use specific answer formats to ensure the correct results. It’s important to use the right items to collect answers in the right format. For example, only use an Email Address item to collect email addresses. Another common item type is the Dropdown item. This item allows form users to see a variety of acceptable answers before choosing one. Checkboxes allow form users to choose more than one preset answer. Short Answer and Long Answer items allow form users to answer a question or fill out a form field in greater detail, using longer sentences. - No long form pages.
Online users in general respond better to one question at a time and are more likely to convert on your form when there are fewer questions per page. This best practice is to use Page Break items to only display a few questions on each page to focus the visitor’s attention. - Make use of placeholder text.
Now and again an answer needs a specific format for use in other applications after submission. Use placeholder text to show form users the format you expect to receive. For example, if you need form users to enter a phone number, you can add placeholder text to show the format you prefer, like (123) 456-7890. - Don’t send a confirmation email. Use a Success Page.
Too often, confirmation emails from organizations and businesses end up in the spam folder. Avoid sending emails containing simple messages like “Thank you for your submission”. Instead use a Success Page that form visitors see immediately after submitting the form. - Let users opt-in.
Subscribing customers or donors to your organization’s mailing list will not endear them to you. Instead at the end of your form, add a Checkbox item with a choice like “Agree to receive our email.” Use the conditional logic with the Notifications to only send to visitors who checked that box.
Best Practices for Creating Online Forms with PayPal
Online forms that collect payments using PayPal have their own best practices, too. Follow these tips to reduce errors and encourage successful payments while also keeping users happy:
- Order form fields from the simplest to the most complex.
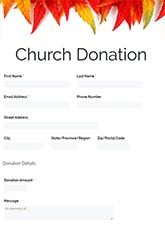
Form users are more likely to convert and submit a form when they start with small simple steps and fields. Little tasks at the beginning of a form increase buy-in, which encourages respondents to keep going. Start with low risk, easy to fill out fields like name and address. - Include accurate descriptions.
No matter the product or service, more information equals higher conversion rates. Use images if appropriate. Incorporate descriptive titles and product or service summaries. More information about what users are buying will increase confidence and conversions. - Reduce unnecessary work.
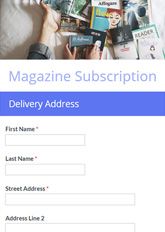
Never ask a potential customer, event attendee, or donor to jump through hoops to become your customer. For example, it’s common for shipping and billing addresses to be the same. Build the form with both address blocks then add a Checkbox for “Different shipping address”. You can then add Rules to the shipping address items to show only after checking that box. - Make your online form with PayPal mobile-friendly.
All Formsite forms are responsive, but here are a few tips to optimize your online form for all visitors:- Split long forms into shorter pages to reduce scrolling. Consider using only one item per page.
- Large images can take a long time to load on mobile devices. Use an image editor to reduce the height and width to also reduce the file size.
- Don’t use complex item types as these can be difficult to use on a small screen.
- Use your form’s provided QR code on printed materials for easy mobile links.
- Develop and include a privacy policy.
If you don’t already have a privacy policy in place, establish one and then follow it. For online purchases especially, visitors appreciate knowing you are protecting their information. - Use the Success Page as a receipt.
The Success Pages display after completing the form and payment. The built-in Success Page shows the visitor that the order is successful. Enabling the options to show the Order Summary and printable receipt display those items as well. Another option is to create a custom receipt with the Success Page’s message box and the form’s pipe codes. Also consider including your customer service contact information for the best service. - Don’t forget a great CTA.
A good CTA (call to action) helps to elevate online form conversions. Use your form’s Form Settings -> Custom Text page to customize the button text, whether it’s “Donate Now”, “Request Service”, or “Place Order”.
The Benefits of Formsite’s PayPal Integration
- Use PayPal Business to take advantage of PayPal’s most current smart buttons. Accept payments from credit and debit cards, PayPal accounts, Venmo, PayPal Credit, Pay in 4, and local processors around the globe.
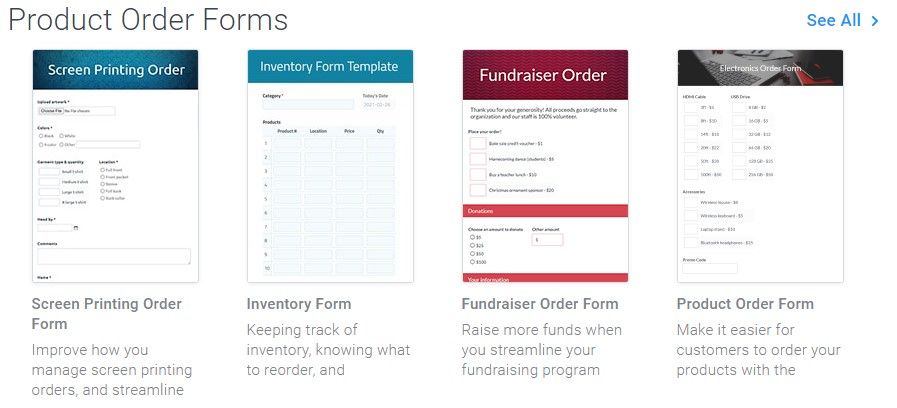
- Formsite has hundreds of prebuilt order form templates that can use the PayPal integration. Regardless of what type of online form you’re creating, you can collect credit card, debit card, and PayPal payments.
- All form templates use our drag and drop editor, so you can always build an online form to reflect your brand. You can also make use of the online form builder tool to create a form from scratch.
- Embed your online form and collect PayPal payments on your site. To build a form with Formsite and to include PayPal as a payment processor requires no coding or HTML knowledge. Every form receives a unique embed code to copy and paste into your website.
- All data in your Formsite account are secure during data collection, processing, and storage.
- Our PayPal integration gives your form users a simplified checkout process and an easy way to pay.
- Formsite’s Integrations make it simple for form owners to connect to other online services like Google Drive, Salesforce, Google Sheets, Microsoft OneDrive, and more. Our Zapier integration allows for connections to thousands of other online services, too.
- With our Workflow tool, form owners can create custom connections between forms to pass data. Workflow is an automation tool that makes it easy to send follow-up forms, approvals, and upsells.
How to Create an Online Form With PayPal
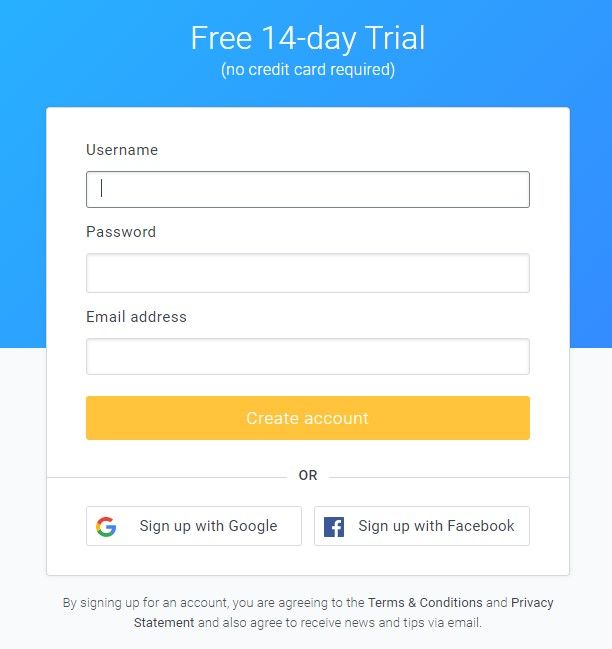
1. Sign up for your free account
To sign up for your free Formsite account, go to Formsite.com and click the Free Trial or Sign Up Free button. Once you’ve signed up, you’ll be immediately enrolled in our Pro 1 service for a 14-day free trial. The Pro 1 trial gives you high limits for testing and grants you access to our integrations, including PayPal.
2. Create your online form
Click the Create New Form button on the My Forms page. Then browse and select a form template or start with a Blank Form. Browse our template library for ideas and examples of questions, styles, and functionality. Once you’ve selected a form template or chosen to start from scratch, click the green “Create New Form” button at the bottom of the page. Type the name of your form in the “Name” field, then click the green “Create” button.
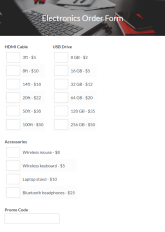
3. Build your order form
Whether you’re using a form template or blank form, use the Form Editor to add, edit, and delete form items.
In the Form Editor you can use our drag and drop editor to add, remove, and edit form items. The Order Form Items section contains pricing items and quantity items to build your order. The Radio Button Pricing item lets you add options with a price, then the visitor selects a choice and that price adds to the order total.
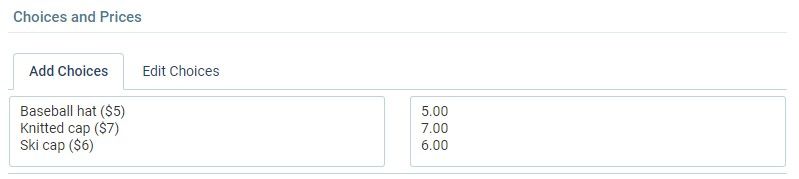
Add a Text Field Quantity item to the left of the pricing item to let the visitor order more than one. The Text Field Quantity item only works when it’s immediately before a pricing item. An alternative to the quantity + pricing sequence is the Quantity List item. That displays a list of choices with the quantity field built in, then calculates the cost and adds to the order total.
The Style tab allows form owners to transform their online form’s appearance so it adheres to brand style guidelines. Change fonts and colors and upload new images with the Themes and Customize areas. If you’d like to make changes to the form’s CSS, you can use the Advanced area to do that.
4. Set Rules for your order form

Rules let you show follow up questions or skip pages in your form. For example, you can have an item ask for the visitor’s country, then display US address items if they answer “USA”, or Canadian items if they answer Canada.
Use the Rules page to view and edit all rules for the entire form, or edit an item and click its Rules tab to edit only that item’s Rules. Page Rules tell the form what to do after that page, like repeat the page or skip to a later page based on a previous answer.
5. Enable the PayPal Integration
After completing your order form, go to Form Settings -> Payments, then click either the PayPal Business or PayPal Personal icon. With PayPal Business you can accept credit and debit cards, global Alternative Payment Methods, and exclusive Pay with PayPal options, giving customers the ability to check out with the unique payment types you can only get from PayPal. Follow the steps to enable the integration with your PayPal account, then click Save.
Add a description of your store in the Item title field to identify where the charge is from when it appears in their statements. The settings page lets you choose either the built-in Order Success page or a custom Success Page. You can change your form’s currency and set up recurring billing for subscriptions or more than one payment.
6. Test your form
The best way to test the form and the PayPal payment integration is to set the price of an item in the form to a low amount, then make a real order. Once you’ve verified that the order was successful, you can restore the original price and refund your transaction.
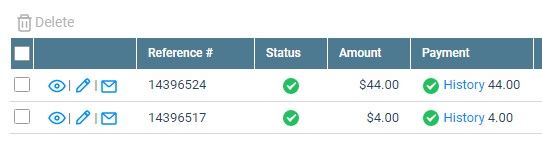
In the form’s Results page, the Results Table contains every form result and order. There are two status columns labeled “Status” and “Payment.” The Status column shows a green “complete” icon for successful results. Results with “incomplete” are not yet submitted completely and the red “alert” status has an integration problem.
The Payment column shows “complete” for successful payments and the History link shows any details. An “incomplete” icon in the Payment column means the order is not complete. If the Status column is green and the Payment column is yellow, that means the visitor’s payment was not successful. For unsuccessful payments, there is not much you can do besides send a follow-up email to try and persuade them to submit the form again. If they do not, you can delete the result.
Use the Form Settings -> Notifications page to send emails after each submission or successful payment. The Notifications have conditional logic where you can send only after the payment success. The default action sends Notification emails after submitting but before payments.
7. Share your PayPal order form
Every form gets its own unique link under “Form Link” on the Share page. You can also embed the form on your site so it appears at your custom URL. To do this, create the page on your site where you want the form to appear, then copy and paste the provided code under Share -> Embed Code. If your site is a WordPress site and you’ve installed the Formsite WordPress plugin, use the shortcode provided under the Share -> WordPress page.
Should you need any help while creating, editing, testing, or sharing your form, click the Support link at the top of the page. From there, you can ask a question, check our knowledgebase articles, or send an email to our Customer Support team.
Building online forms that can accept payments through PayPal is easy with Formsite. Get started today!